
Tags
annuals, broad beans, capsicum, CERES, CERES Nursery, chicken manure, compost, corn, cow manure, cucumber, Dietes, Diggers, Eden Seeds, food, garden, gardens, Green Renters, Heirloom plant, heritage tomatoes, hot house, Kale, pak choy, Plant, plants, Principessa Borghese, propagation, propagation time, rocket, Romano Burghanese, Russell's Jalapenos in Brine, Russian kale, Seed, seed colecting, seed saving, seedlings, seeds, silver beet, Sowing, spinach, spring, sun dried tomatoes, sustainable gardening, Tomato, tomato seeds, tomatoes, urban sustainability, vegetables, worms
I’ve invariably got seeds of some kind in my pockets, which I’ve collected on my wanderings, or from friends and neighbours’ gardens. As I write, I’ve got a handful of Dietes seeds in my pocket, scrounged from a neighbour’s yard this afternoon. Hardy and drought-tolerant, I’ll be planting them along the front, where it doesn’t get much rain. But I’ve been known to walk around with pockets full of seeds for weeks … Sometimes, by the time I remember they’re in there, I’ve forgotten what they are.
Collecting, saving and propagating seeds has a lot of benefits, not least the immense satisfaction gained from growing plants from your own seeds. The other obvious benefits are saving money, knowing exactly where your plants came from and what they grew in, and growing and preserving varieties that industrialised food production has made every effort to eradicate.
If you’re just starting your veggie garden, purchase some good quality seeds (Eden Seeds or Diggers Club are recommended) or seedlings from a good nursery and then, following your first crop, let one or two of your stronger plants go to seed and start collecting and saving (label them carefully, to avoid the old mystery crop debacle).

Russian Kale: this is third generation kale from seeds I’ve saved, with the original seedlings from CERES Nursery. And all the healthiest and tallest broad beans (back corner) are self-sown from the ones I dug in as green manure last year. (The joy of self-sown plants is something upon which I will wax lyrical another time.)
One of the tricks I’ve developed over the years is saving seeds from my favourite tomato varieties (the most prolific, best tasting and least troublesome) by drying them onto handmade paper (made by the kids), and, of course, labeling them by writing on the paper. Thin cardboard or rough brown paper works just as well. Once the seeds have dried, store the sheets in a dry, dark and mouse-proof spot until tomato propagation time comes around again.


Principessa Borghese tomato seeds: bred by the Borgheses for sun dried tomatoes, these are my all-time favourite tomato variety. I also planted some ‘past their used by date’ Romano Burghanese, which I haven’t tried before. But for a mere $1 for the packet, what the hell! And both varieties have already started to sprout.

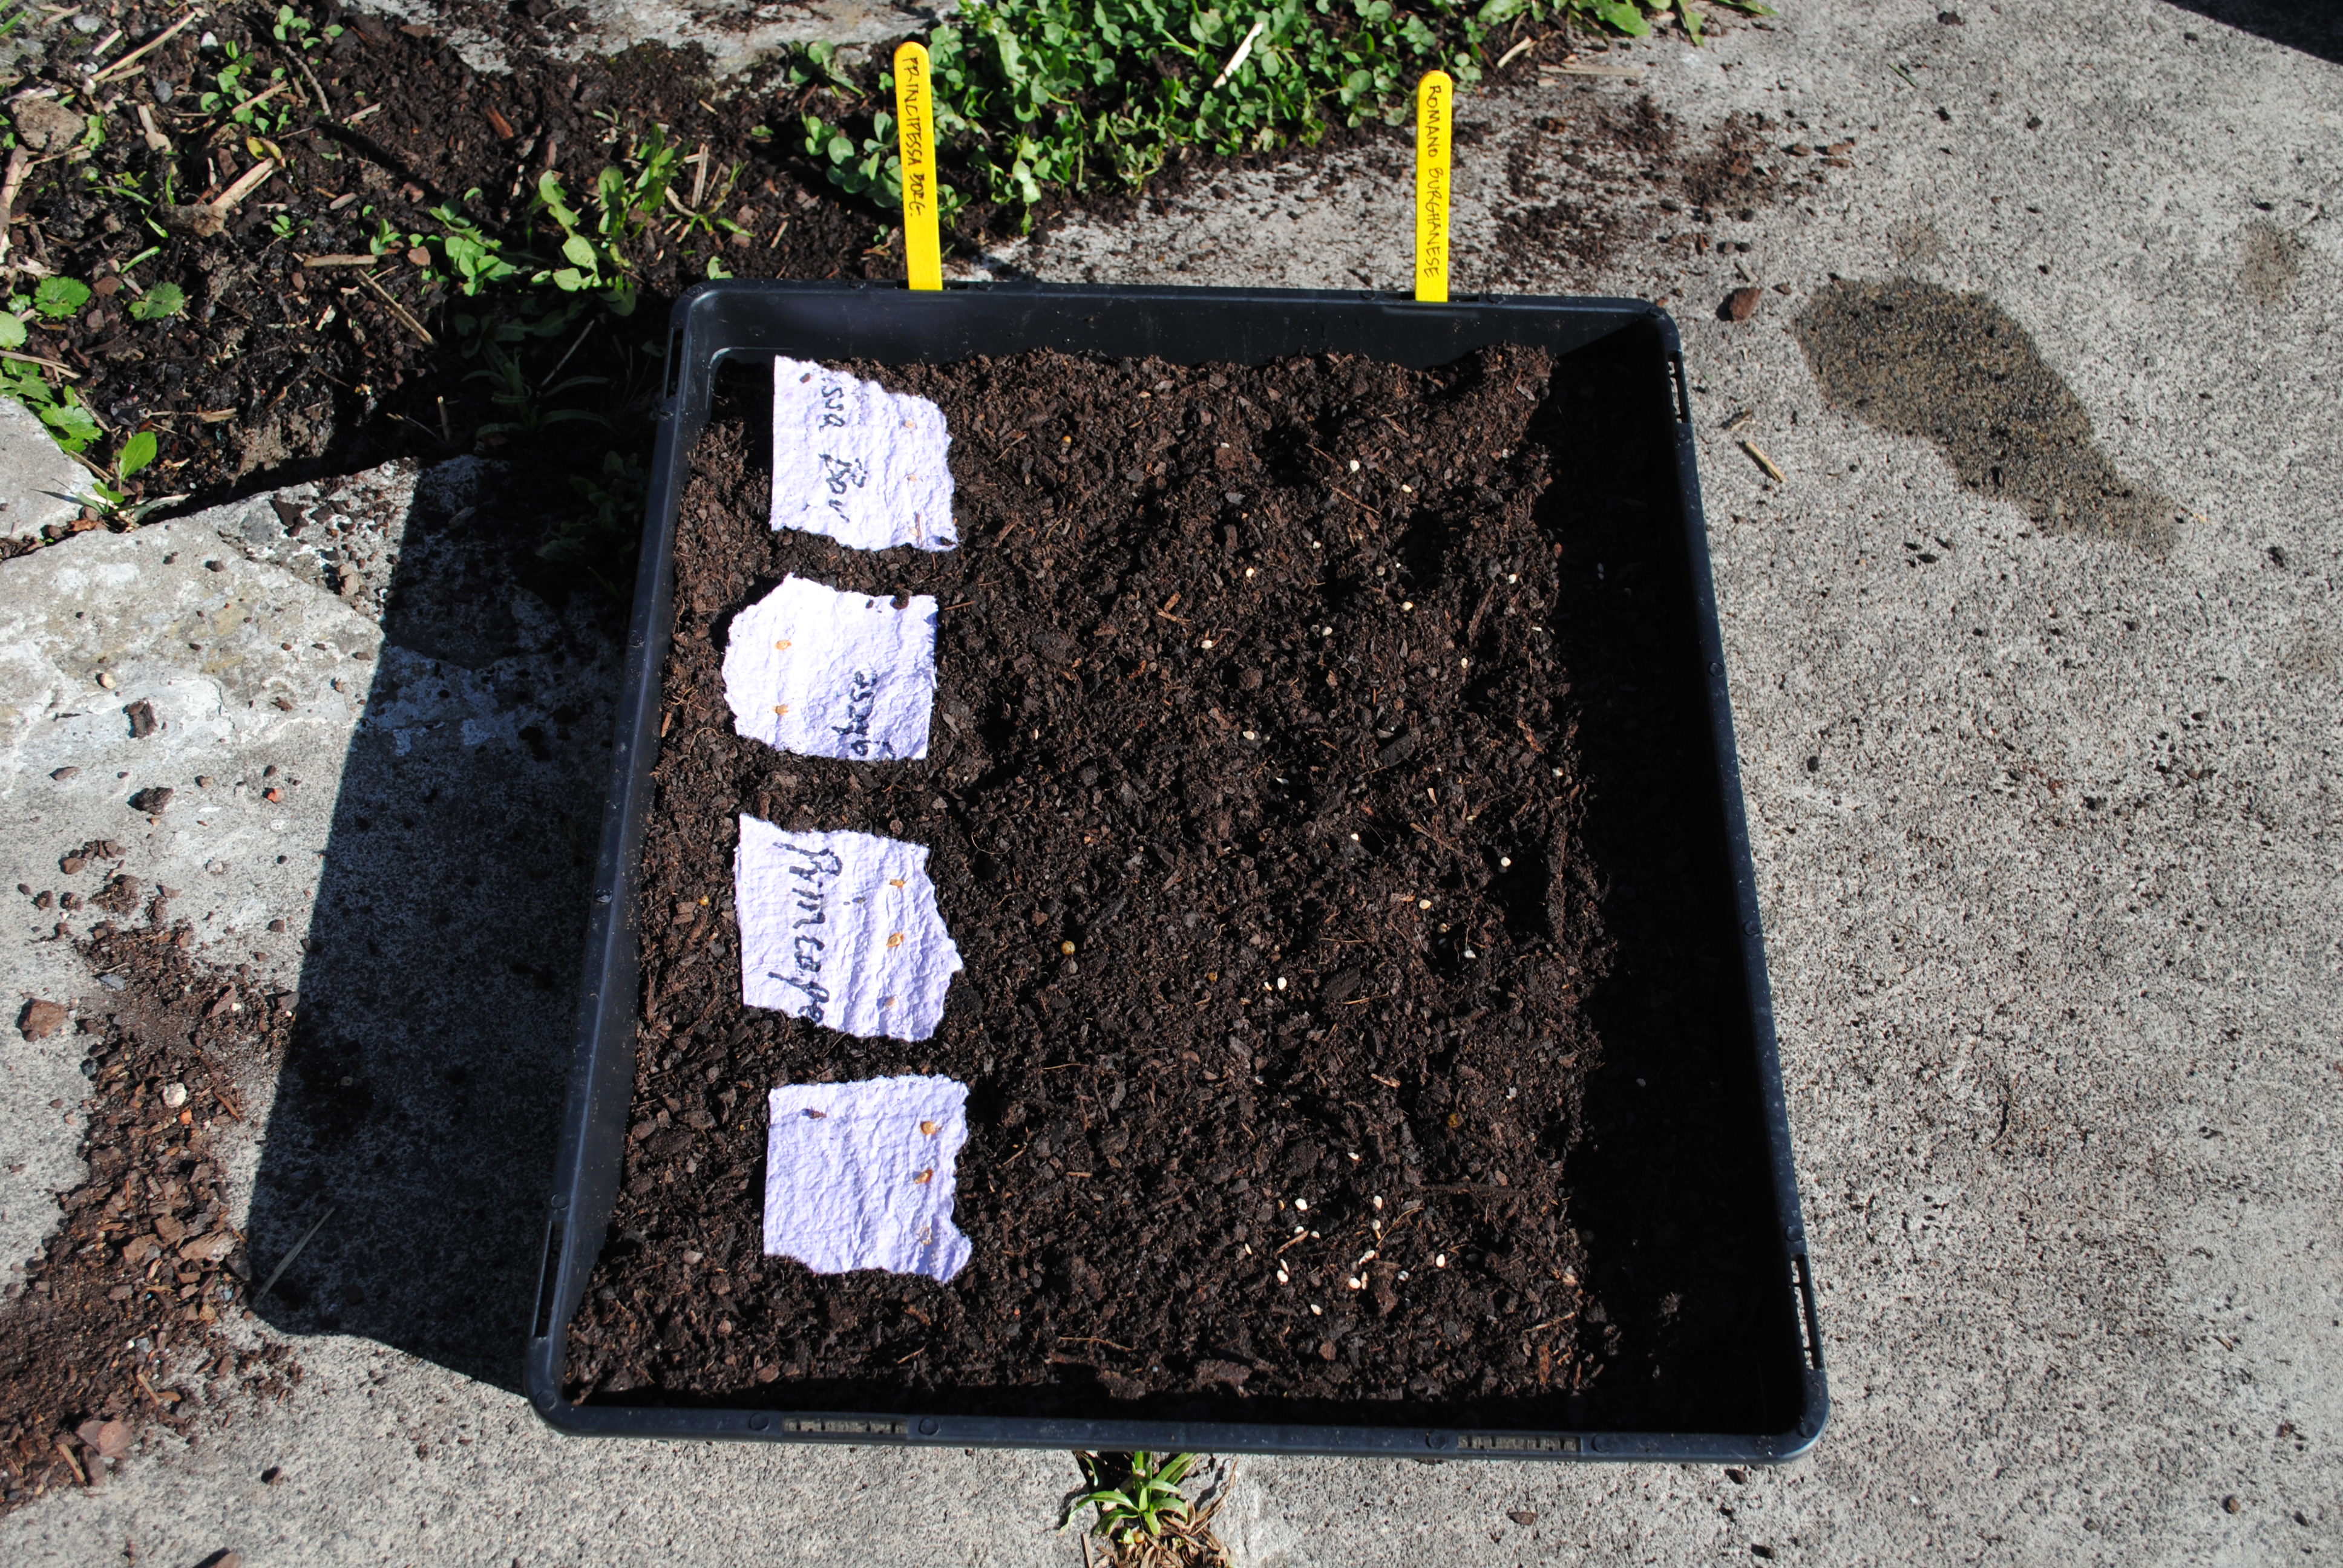
Planting the tomato seeds: to plant the tomato seeds, you just tear up the paper, spread them out in a seed tray and cover with a layer of seed raising mix. The paper then breaks down over time, with watering, and the seeds sprout.
Just recently we set up a little hothouse (nicknamed ‘The Pod’) so I could venture into propagation on a more serious scale. It’s not huge, and I’d love more space, but for now it’s doing the trick. Timing of propagation is always the key. For tomatoes, in particular, you need to count back a couple of months from the time you usually put them in the ground, to allow for them to get big enough to transplant. Late winter, then, is when you should really begin to think about your summer vegetable propagation.


‘The Pod’, made by Coolaroo: it’s pretty simple, and we had to perform a few slight improvements, but overall, a neat little hothouse. And now I’m sprouting pretty much everything I’m growing in the garden from here on in, including lots of annuals for companion planting.
Russell, of ‘Russell’s Jalapenos in Brine‘ fame, spent this past warm weekend doing some propagation with his son, Turlough. Below are some photos of what they got up to.


Super organised propagators: Russell and Turlough planted cucumber, spinach, kale, corn, heritage tomatoes (from Diggers), capsicum, rocket, silver beet, and pak choy. The picture on the left is a bed that Russell topped up with homemade compost (with its many 1000s of worms), a dressing of cow and chicken manure and organic potting mix, covered over with sugar cane mulch. In a few weeks, the bed will be good and ready for the seeds when they sprout.
Stay tuned over the next couple of months, as seeds turn into seedlings and are sown around the garden. If you are propagating, remember to keep the seeds and seedlings damp, as the wind we’ve been getting is drying everything out in an instant. And send me some propagation stories – successes, hints and lessons learned.
Even though Kermit the Frog had a bit of trouble with it, it’s really not that hard being green. Perhaps Kermit was just way too far ahead of his time …

Pingback: The Miracle Of Life | Free, Fun or Interesting
Pingback: Losing control of the wheel. | niutblog